For the Love of Pizza!

I grew up having pizza every Friday night and it is now a tradition with my family. We love it! If you’ve even been to my house on a Friday, or for a gathering, you’ve probably had my pizza!

IMGP0124

I like that I don’t have to think about what’s for dinner on Friday’s. I just create a pizza depending on what ingredients are available, and maybe have a salad on the side. Once you have it down, pizza is a super-easy meal to make, is really good for you, and can take less than 45 minutes from prep to table.

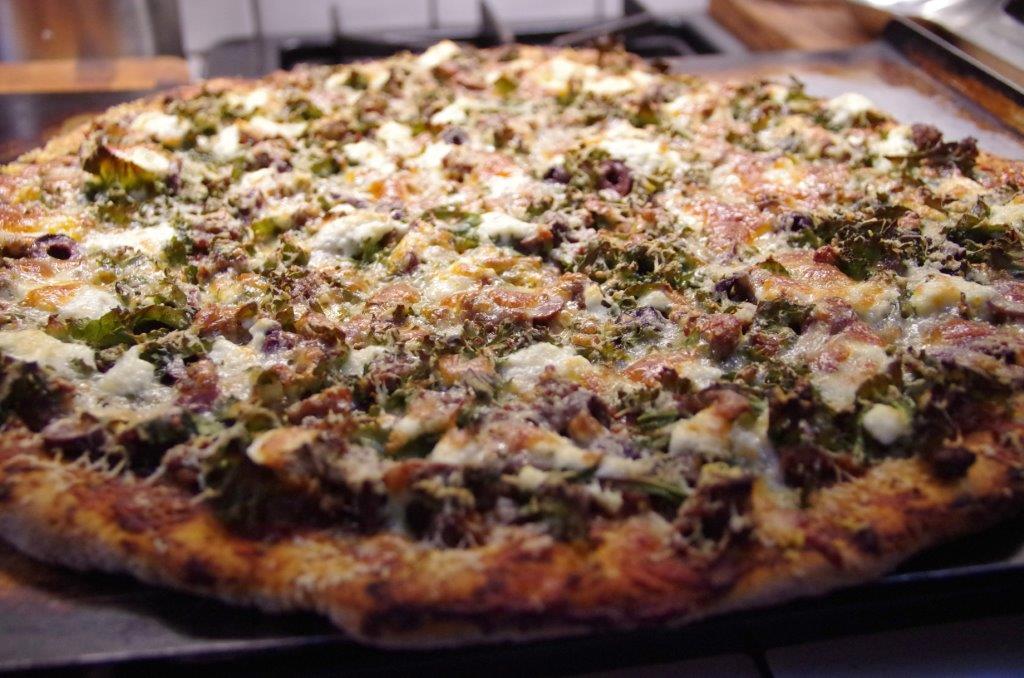
Here’s my pizza recipe and tips for you to use as a guideline. Happy Cooking!

IMGP0129

Put pizza stone in cold oven, center rack & preheat to 500 degrees.

THE DOUGH:

I often don’t let the dough rise at all, I just make it first when I’m making pizza that evening. You can let is rise for a few hours as long as it’s covered with a wet cloth. Just punch it down before you use it. You can also make it ahead of time & put it in the fridge (in a plastic bag or wrap) and take it out about an hour ahead, so it warms up to a workable state.

  • 1 cup hot water
  • 1 teaspoon yeast
  • 3 cups flour (the mix that I really like creates a good balance of textures, moistness, flavors & elasticity- 1 c white, 1 c spelt, 1/2 c quinoa, 1/2 c red wheat)
  • 3 teaspoons sugar
  • 1 teaspoon salt
  • 3 tablespoons olive oil

Take a glass measuring cup and fill with 1 cup of hot water (temperature should be not quite boiling, but hot enough to activate the yeast without killing it). Sprinkle 1 tsp yeast on top of water & set aside.

IMGP1123

Mixing the dough- I use a Kitchen Aid Mixer with a dough hook for mixing the dough because it makes it so easy. No worries if you don’t have one, just mix by hand.

IMGP1127

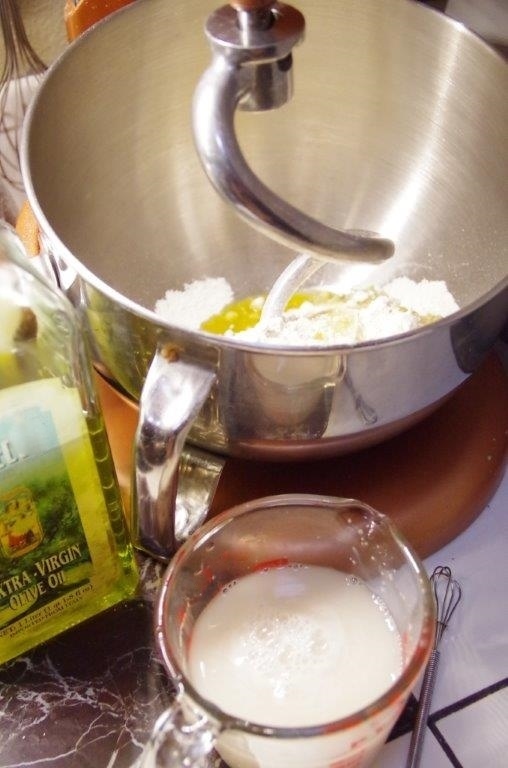
Put the rest of the dry ingredients in a bowl (flour, sugar, salt). Drizzle the olive oil into the bowl. Mix the water & yeast with a whisk or fork & pour into the bowl. Set mixer on stir (lowest setting) and let the dough hook do its work just until the dough forms a ball around the dough hook.

IMGP1129

Don’t over mix if you are using spelt flour, it does better if it’s not over worked. Peel the dough off the hook, form a ball and set in the bowl until your ready to use it.

IMGP1131

THE SAUCE:

There are so many different kinds of sauces one could use. Most of the time I use a basic red sauce. If I have marinara sauce made and frozen in containers (which I do because I make big batches & freeze in smaller portions), then I just take out approximately a 1/2 cup & thaw it out. If you are short on time you can make a basic red sauce or buy a good canned sauce (they make some pretty good organic ones these days). A jar of store bought sauce should make 3 pizzas, so use some & freeze the rest for next week.

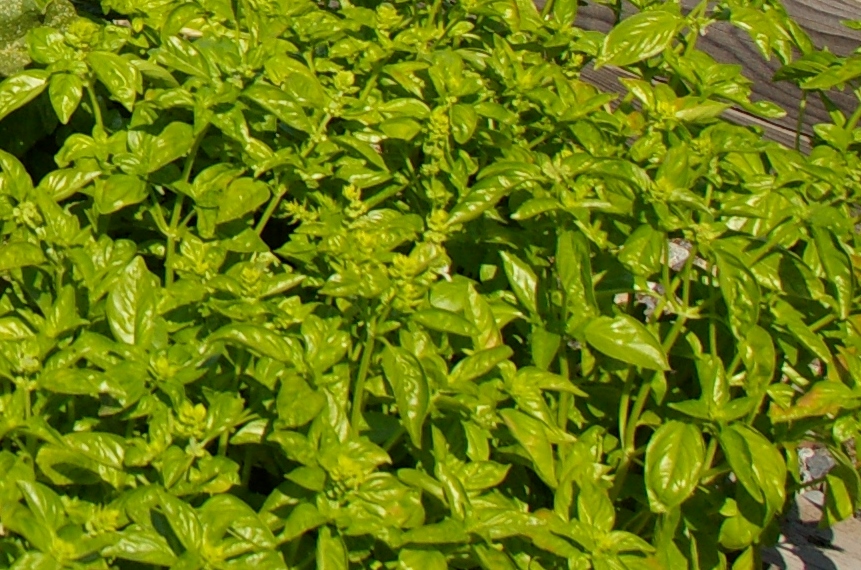
Red Pizza Sauce- If you don’t have any sauce on hand you can make a quick tomato based pizza sauce using canned/jarred tomato sauce & paste, garlic, olive oil, salt, basil*, & oregano*. I have these herbs frozen because I like them better this way compared to dried, but use what you have on hand. Fresh is always best when it comes to cooking, but isn’t always available. The thicker the pizza sauce, the better.

IMGP0109

*Herb Tip- When the herbs are  in season, put them in a food processor with olive oil, pack into jars or ice cube trays & freeze for later use. You can do this with any herbs: basil, oregano, dill, cilantro, chervil, parsley, etc… I also freeze my pesto this way.

IMGP3264

Cream Sauce- You can also make various cream sauces pretty quickly. Again, make enough to freeze some for next time. A very basic cream sauce is- melt butter in a pan, skim foam off butter (clarifying butter), add cream (or your desired mix of cream, half & half, milk, etc…), simmer on very low heat & stir/whisk constantly until thickened, add Parmigiano or Romano cheese  and  whisk together just until melted. You can add roasted garlic, roasted peppers, roasted garlic scapes, etc… as desired.

No Sauce- No sauce is also an option. Just stick to olive oil spread out generously all over the dough. If you like, spread on a little pesto (any type of pesto), or sprinkle any fresh or dried herbs.

THE TOPPINGS:

Use what you have on hand & get creative with combinations. The key is not to go overboard with too many toppings. Choose 4-6 that go well together, and aren’t too heavy or moist of a combination. There are some good pizza combination examples below to give you some ideas.

IMGP0105

Here are a few toppings that we use:

  • Meat*: Italian sausage (we use elk), bacon or Canadian bacon, chicken (or grouse, chukar, quail, etc…), pepperoni, smoked salmon
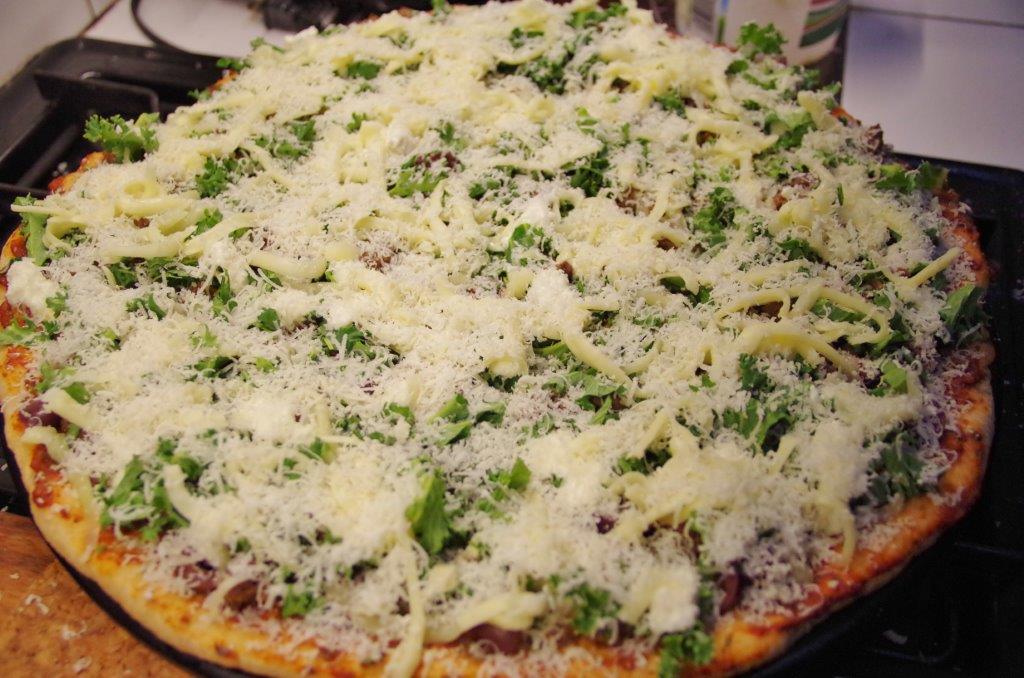
  • Cheese*: Best results come with 8 oz. of grated mozzarella on top. You can also top with some Parmigiano or Romano, use some dollops of ricotta, crumble feta, or use any cheese of your choice depending on what you think might go well with your ingredients.

IMGP0115

  • Fruit, Veggies, Misc.: spinach, kale*, olives of choice*, artichoke hearts, garlic, sun dried tomato, fresh tomato*, dried cranberries, sweet or hot peppers, summer squash*, winter squash*, eggplant*, potato*, onion*, pear*, cauliflower*, mushrooms*

IMGP3142

  • Nuts, & Seeds*: almonds, cashews, pine nuts, macadamia nuts, pecans, peanuts, pumpkin seeds, hemp seeds, sesame seeds, sunflower seeds

IMGP1132

*Topping Tips:

  1. Meat- All meat is precooked.
  2. Cheese- I order a case of organic mozzarella chedar in 8 oz packages, then I take out one a week for pizza. If you forget to take it out ahead of time, put it in a bowl of warm water & it will thaw quickly.
  3. Olives-  We always have a jar of Kalamata in the fridge & love them on pizza
  4. Kale- I chop it small, put it on the top of the pizza just under the cheese, and this makes it a little crispy. We put kale on almost every pizza and it’s delicious!
  5. Tomato- For pizza, I like fresh tomatoes better when chopped or thin sliced, then put on after baking. If cooked on the pizza, they release a lot of their water & can create an undesired affect.
  6. Summer Squash- Slice thin & don’t put on too much, or it can be too moist.
  7. Winter Squash We use this a lot in the winter when we have a hunk of leftover cooked squash. Chop & spread out little pieces. It’s fantastic with cauliflower, pine nuts & chicken or sausage!
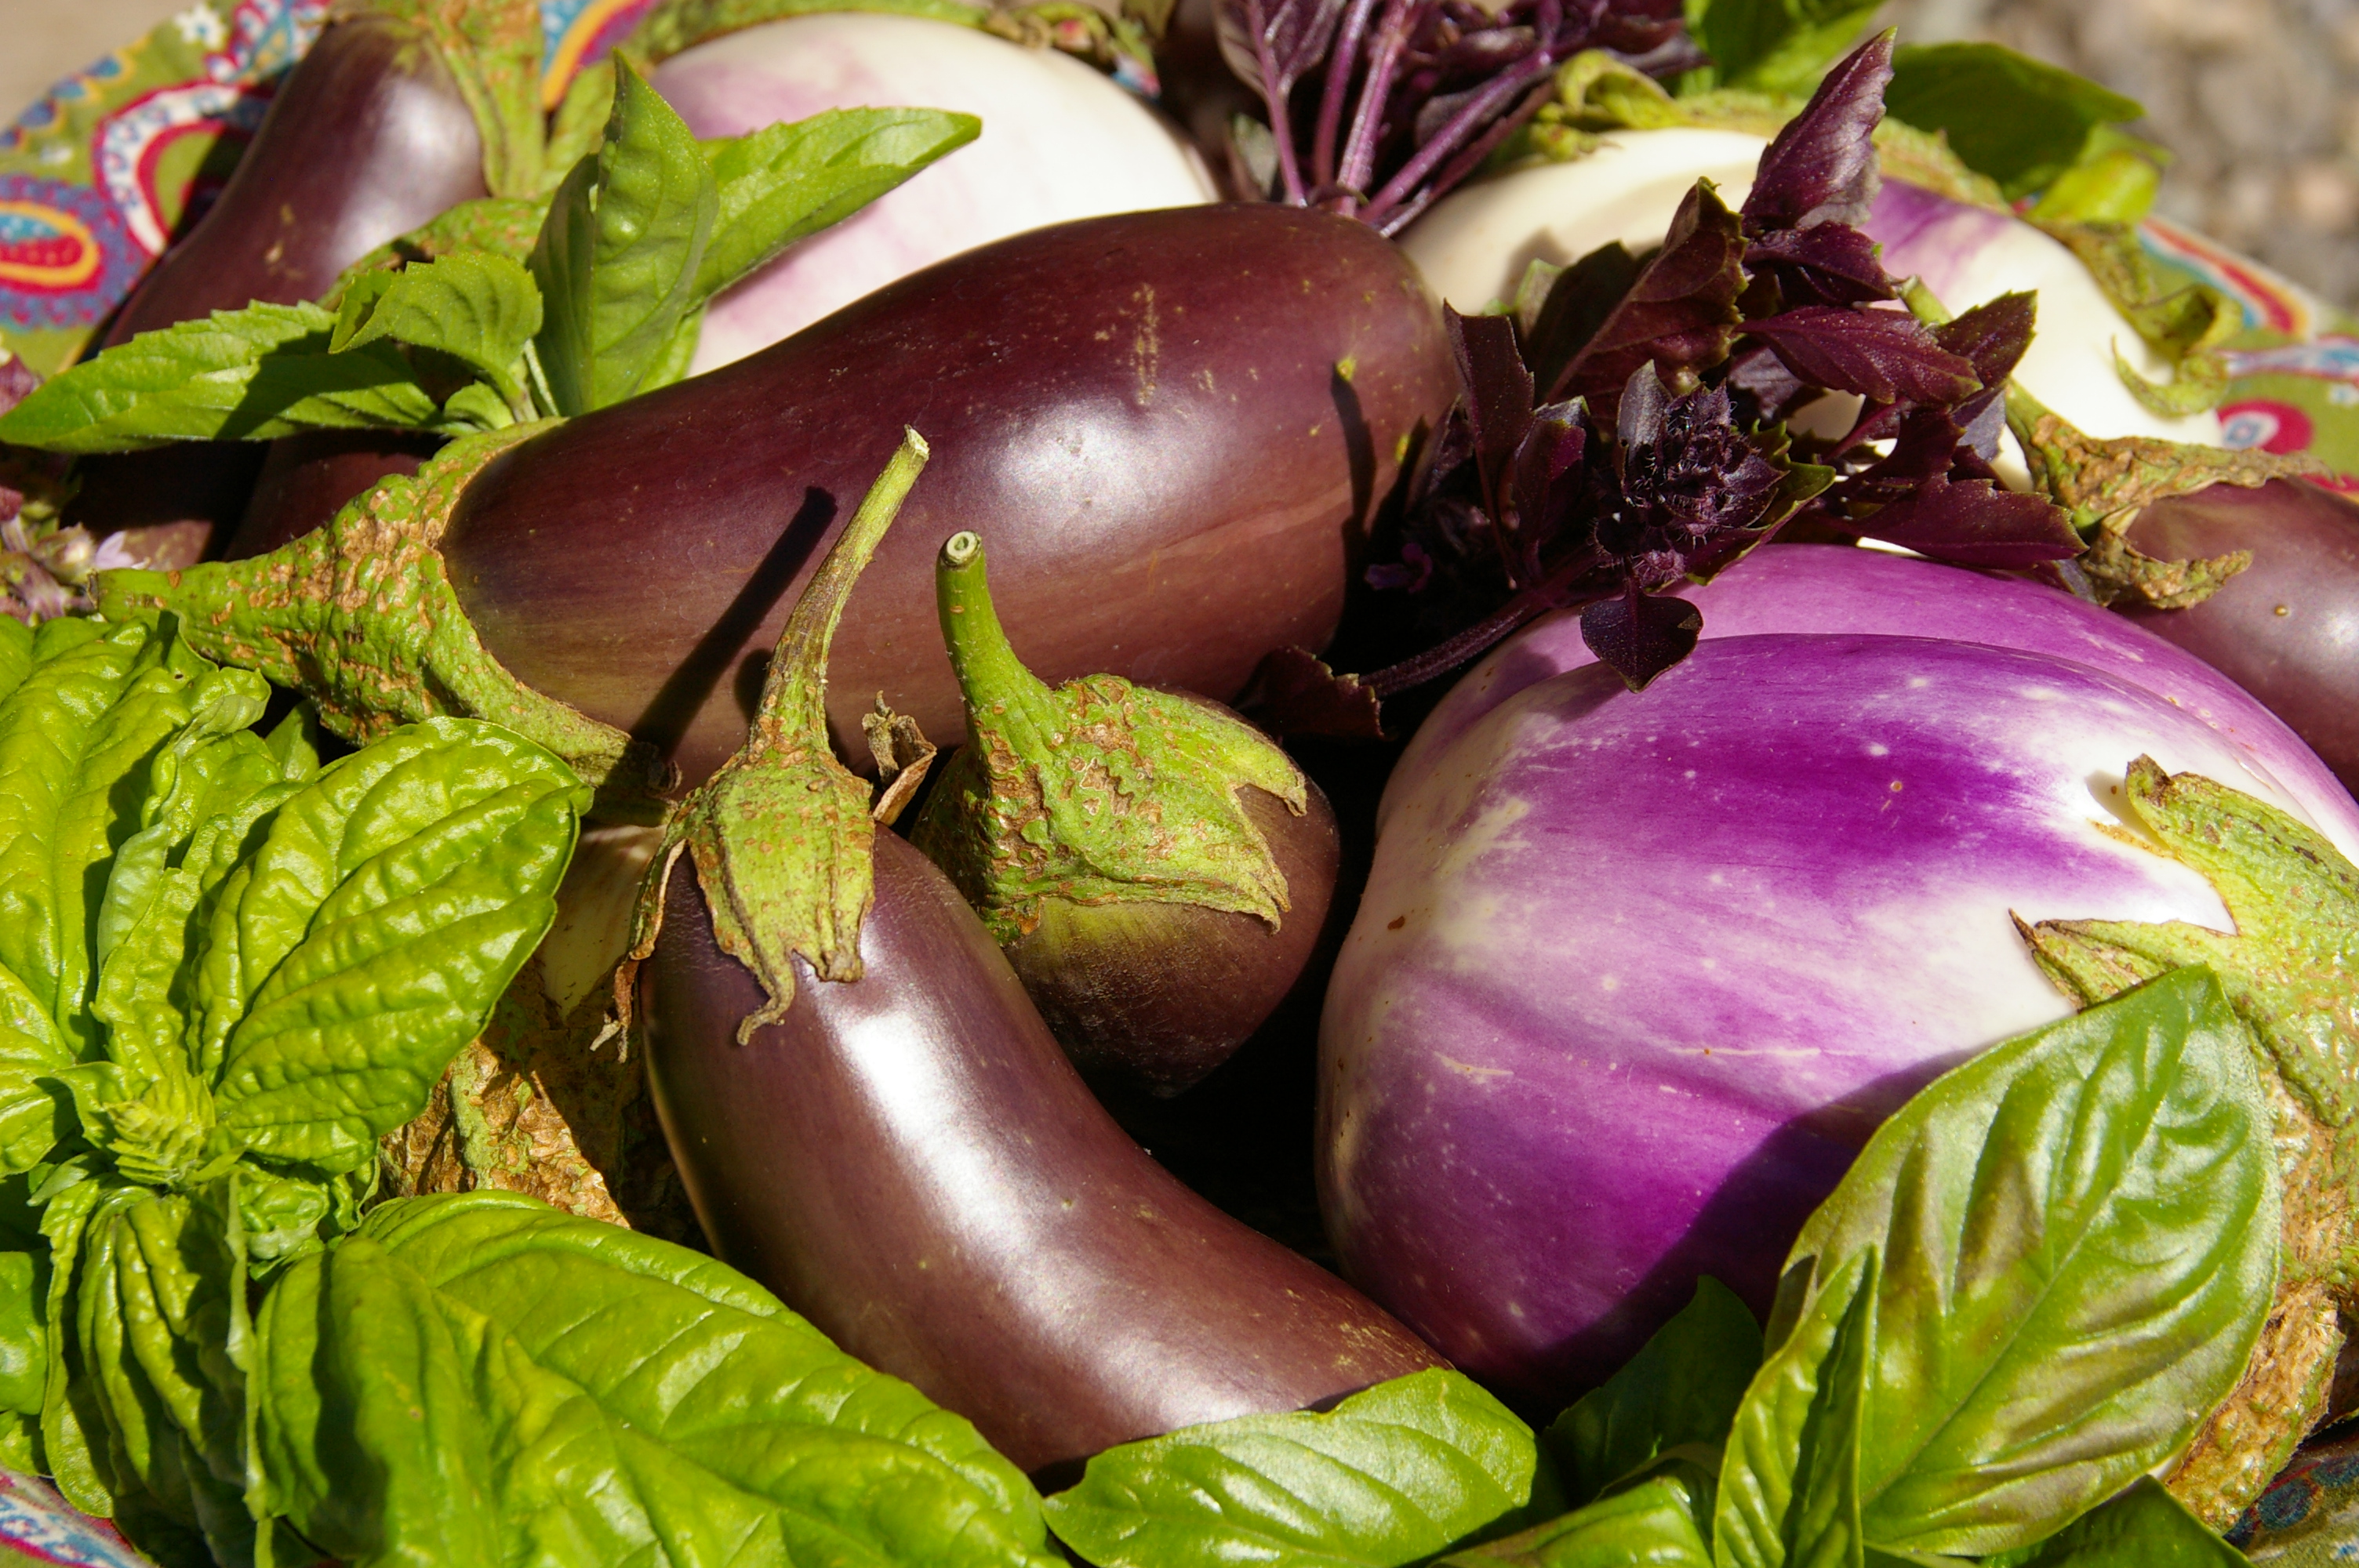
  8. Eggplant- Slice very thin, coat with olive oil & pre-roast on the pizza stone.
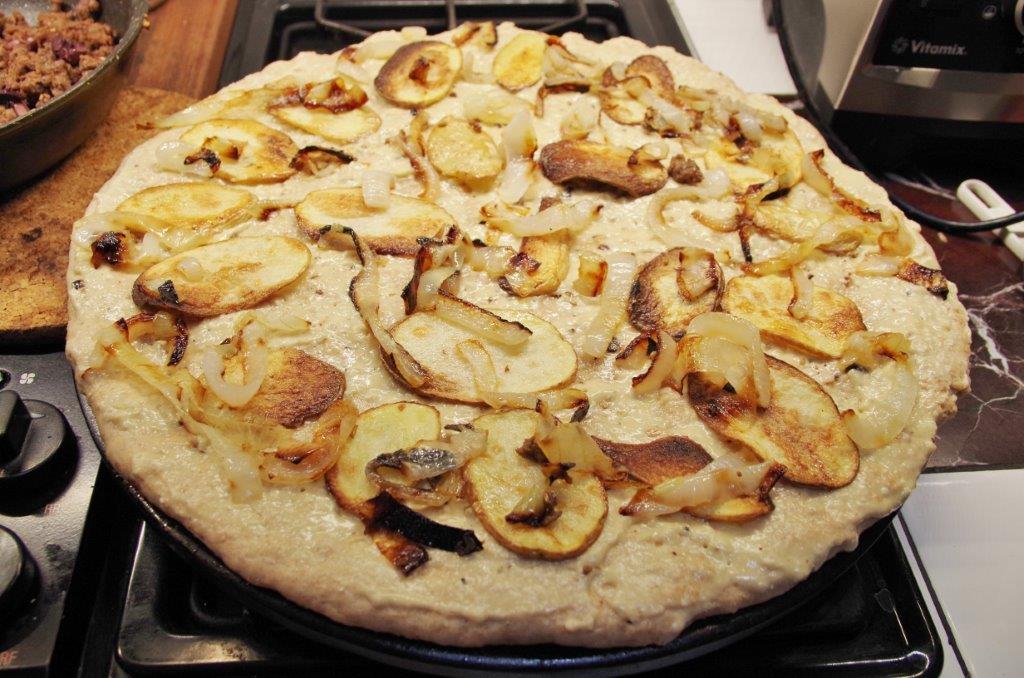
  9. Potatoes- Slice very thin, coat with olive oil & pre-roast on the pizza stone.
  10. Onions- I’m not a huge fan of raw onions on my pizza, but I love them if they are either precooked (like caramelized sweet onions, yumm) or very thinly sliced sweet or red onion placed on the very top of the pizza so they cook in the oven.
  11. Pear- I love Pear on pizza! Slice it really thin & don’t put on too much. It goes great with cream sauces & really brings out other flavors.
  12. Cauliflower- Slice thin, coat with olive oil & pre-roast on the pizza stone.
  13. Mushrooms- If you are using fresh mushrooms, slice thin. If you are using dried, re-hydrate in milk or cream & cut with kitchen scissors into slices or chunks. Squeeze milk/cream out of mushrooms & use. You can add the mushroom milk/cream to your cream sauce!
  14. Nuts & Seeds- Pizza should be good for you! Sprinkle a few nuts & seeds on any pizza!

ASSEMBLING & BAKING THE PIZZA:

IMGP5479

Take your ball of dough & start to stretch & spread out by hand, working it into a disc shape. When you feel like you will start to tear holes, you can set it on a floured surface (I use my counter) & continue to stretch & spread out to the size of your pizza stone. If it tears or holes form, no worries, just push them back together and press firmly. As long as there are no super-thin spots, it will be fine.

IMGP0119

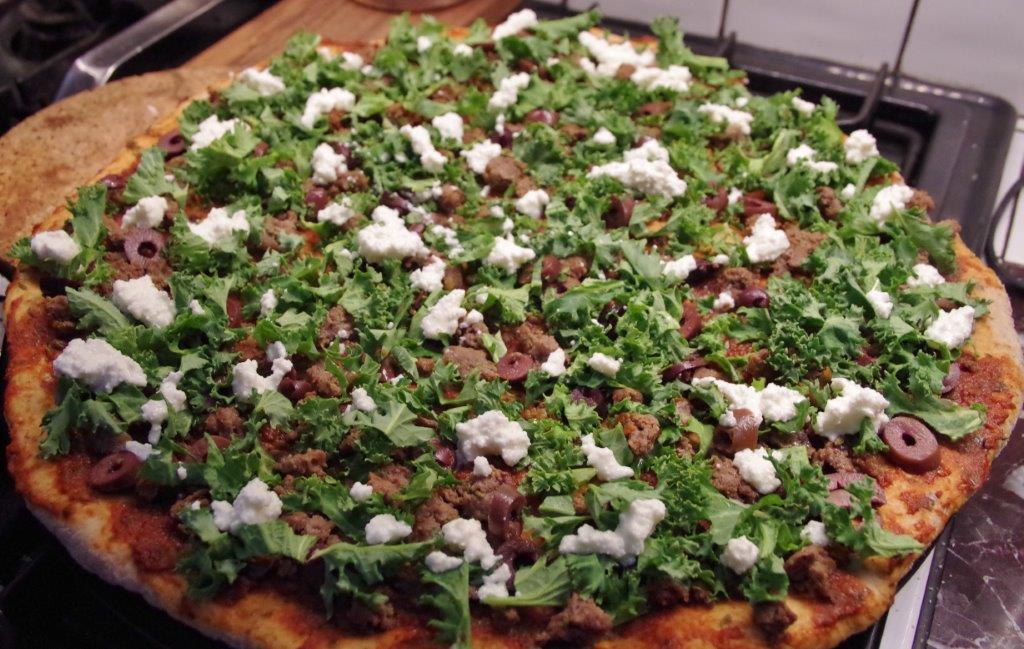
Take the pizza stone out of the oven & set in a safe place to assemble the pizza. I set mine on my stove top with a cork hot pad to level it out. Transfer the dough onto the stone and reshape & press together any thin spots. Spread the sauce with a rubber spatula and layer the ingredients. Put the cheese on top & place in the oven. Bake 11-13 minutes at 500 degrees.

IMGP0121

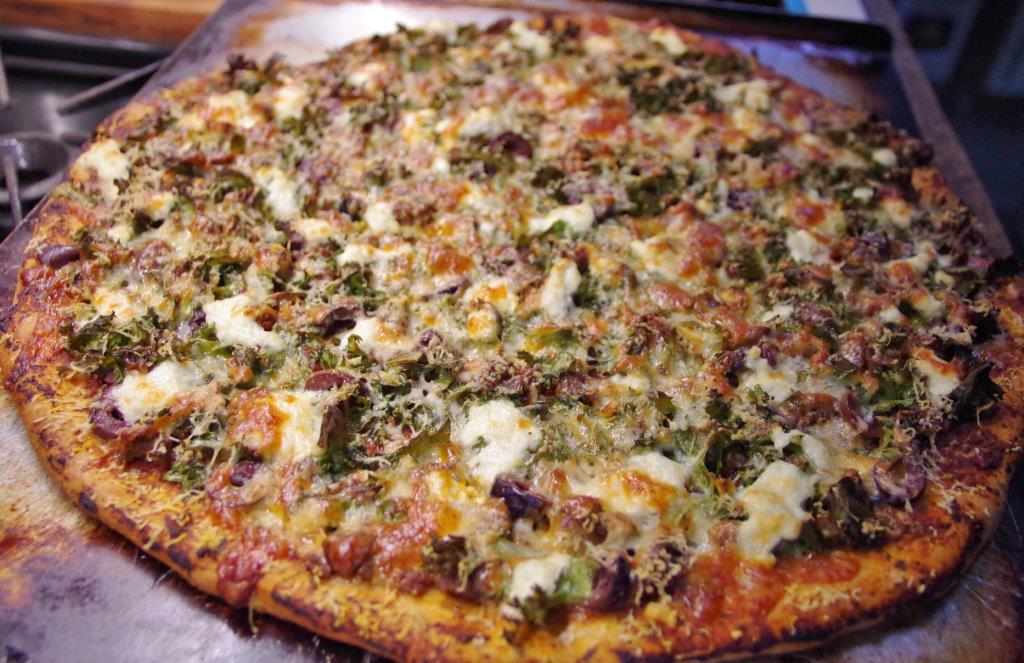
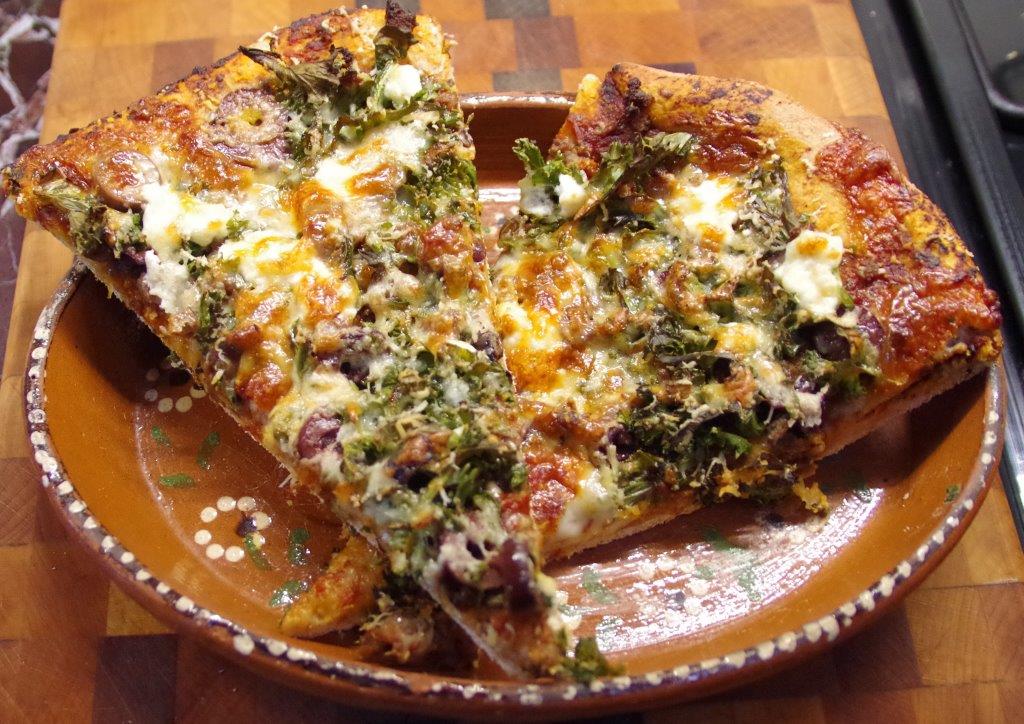
Remove entire stone & pizza from the oven, slide pizza onto cutting board, and return the stone to the oven to cool down with the oven. Top with freshly grated Parmigiano, Romano, and/or crushed hot pepper flakes.

IMGP0125

GOOD PIZZA COMBINATIONS: 

Ingredients are in the order I put them on the pizza

  • The Classic- Red sauce, Italian sausage, Kalamata olives, dried cranberries, sliced jalepeno (or add a chipotle sauce or ground chipotles to the sauce if you like it more spicy), kale, mozzarella cheese
  • Hawaiian- Red sauce, turkey bacon (precooked & chopped in 1-2 inch pieces), pineapple chunks, macadamia nuts chopped, mozzarella cheese (also really good with kale under the cheese layer)
  • Gout Lovers- Red sauce, roasted garlic, chicken, Kalamata olives, sweet peppers, mozzarella cheese
  • Thai chicken- Cream sauce or red sauce with peanut butter added to it, fresh basil leaves, chicken, sweet peppers, green onions (precooked), peanuts or cashews, mozzarella cheese
  • Italian Classic- Red sauce, fresh basil, pepperoni, Italian sausage, olives, ricotta cheese, mozzarella cheese
  • Summer Italian Special- Red sauce, fresh basil leaves, pre-roasted eggplant, bacon, garlic, mozzarella & Parmigiano or Romano cheese (also really good with kale under the cheese layer)
  • Fall Harvest- Red or cream sauce, grouse or chukar, sliced pear,Kalamata olives, sliced almonds,  roasted garlic, kale, mozzarella cheese (or mix with Gouda, Parmigiano or Romano)
  • Winter Delight- Red or cream sauce, chicken or Italian sausage, winter squash, pumpkin seeds, cauliflower, pine nuts, kale, mozzarella cheese
  • Sockeye Special- Cream sauce with roasted garlic, smoked salmon, spinach, mushrooms, mozzarella cheese, top with fresh tomatoes
  • Vegi- Red sauce, summer squash, sweet peppers, olives, feta cheese, mozzarella cheese
  • Idaho Classic- Red or cream sauce, potato, Italian sausage or bacon, precooked caramelized onions,  mushrooms, mozzarella cheese
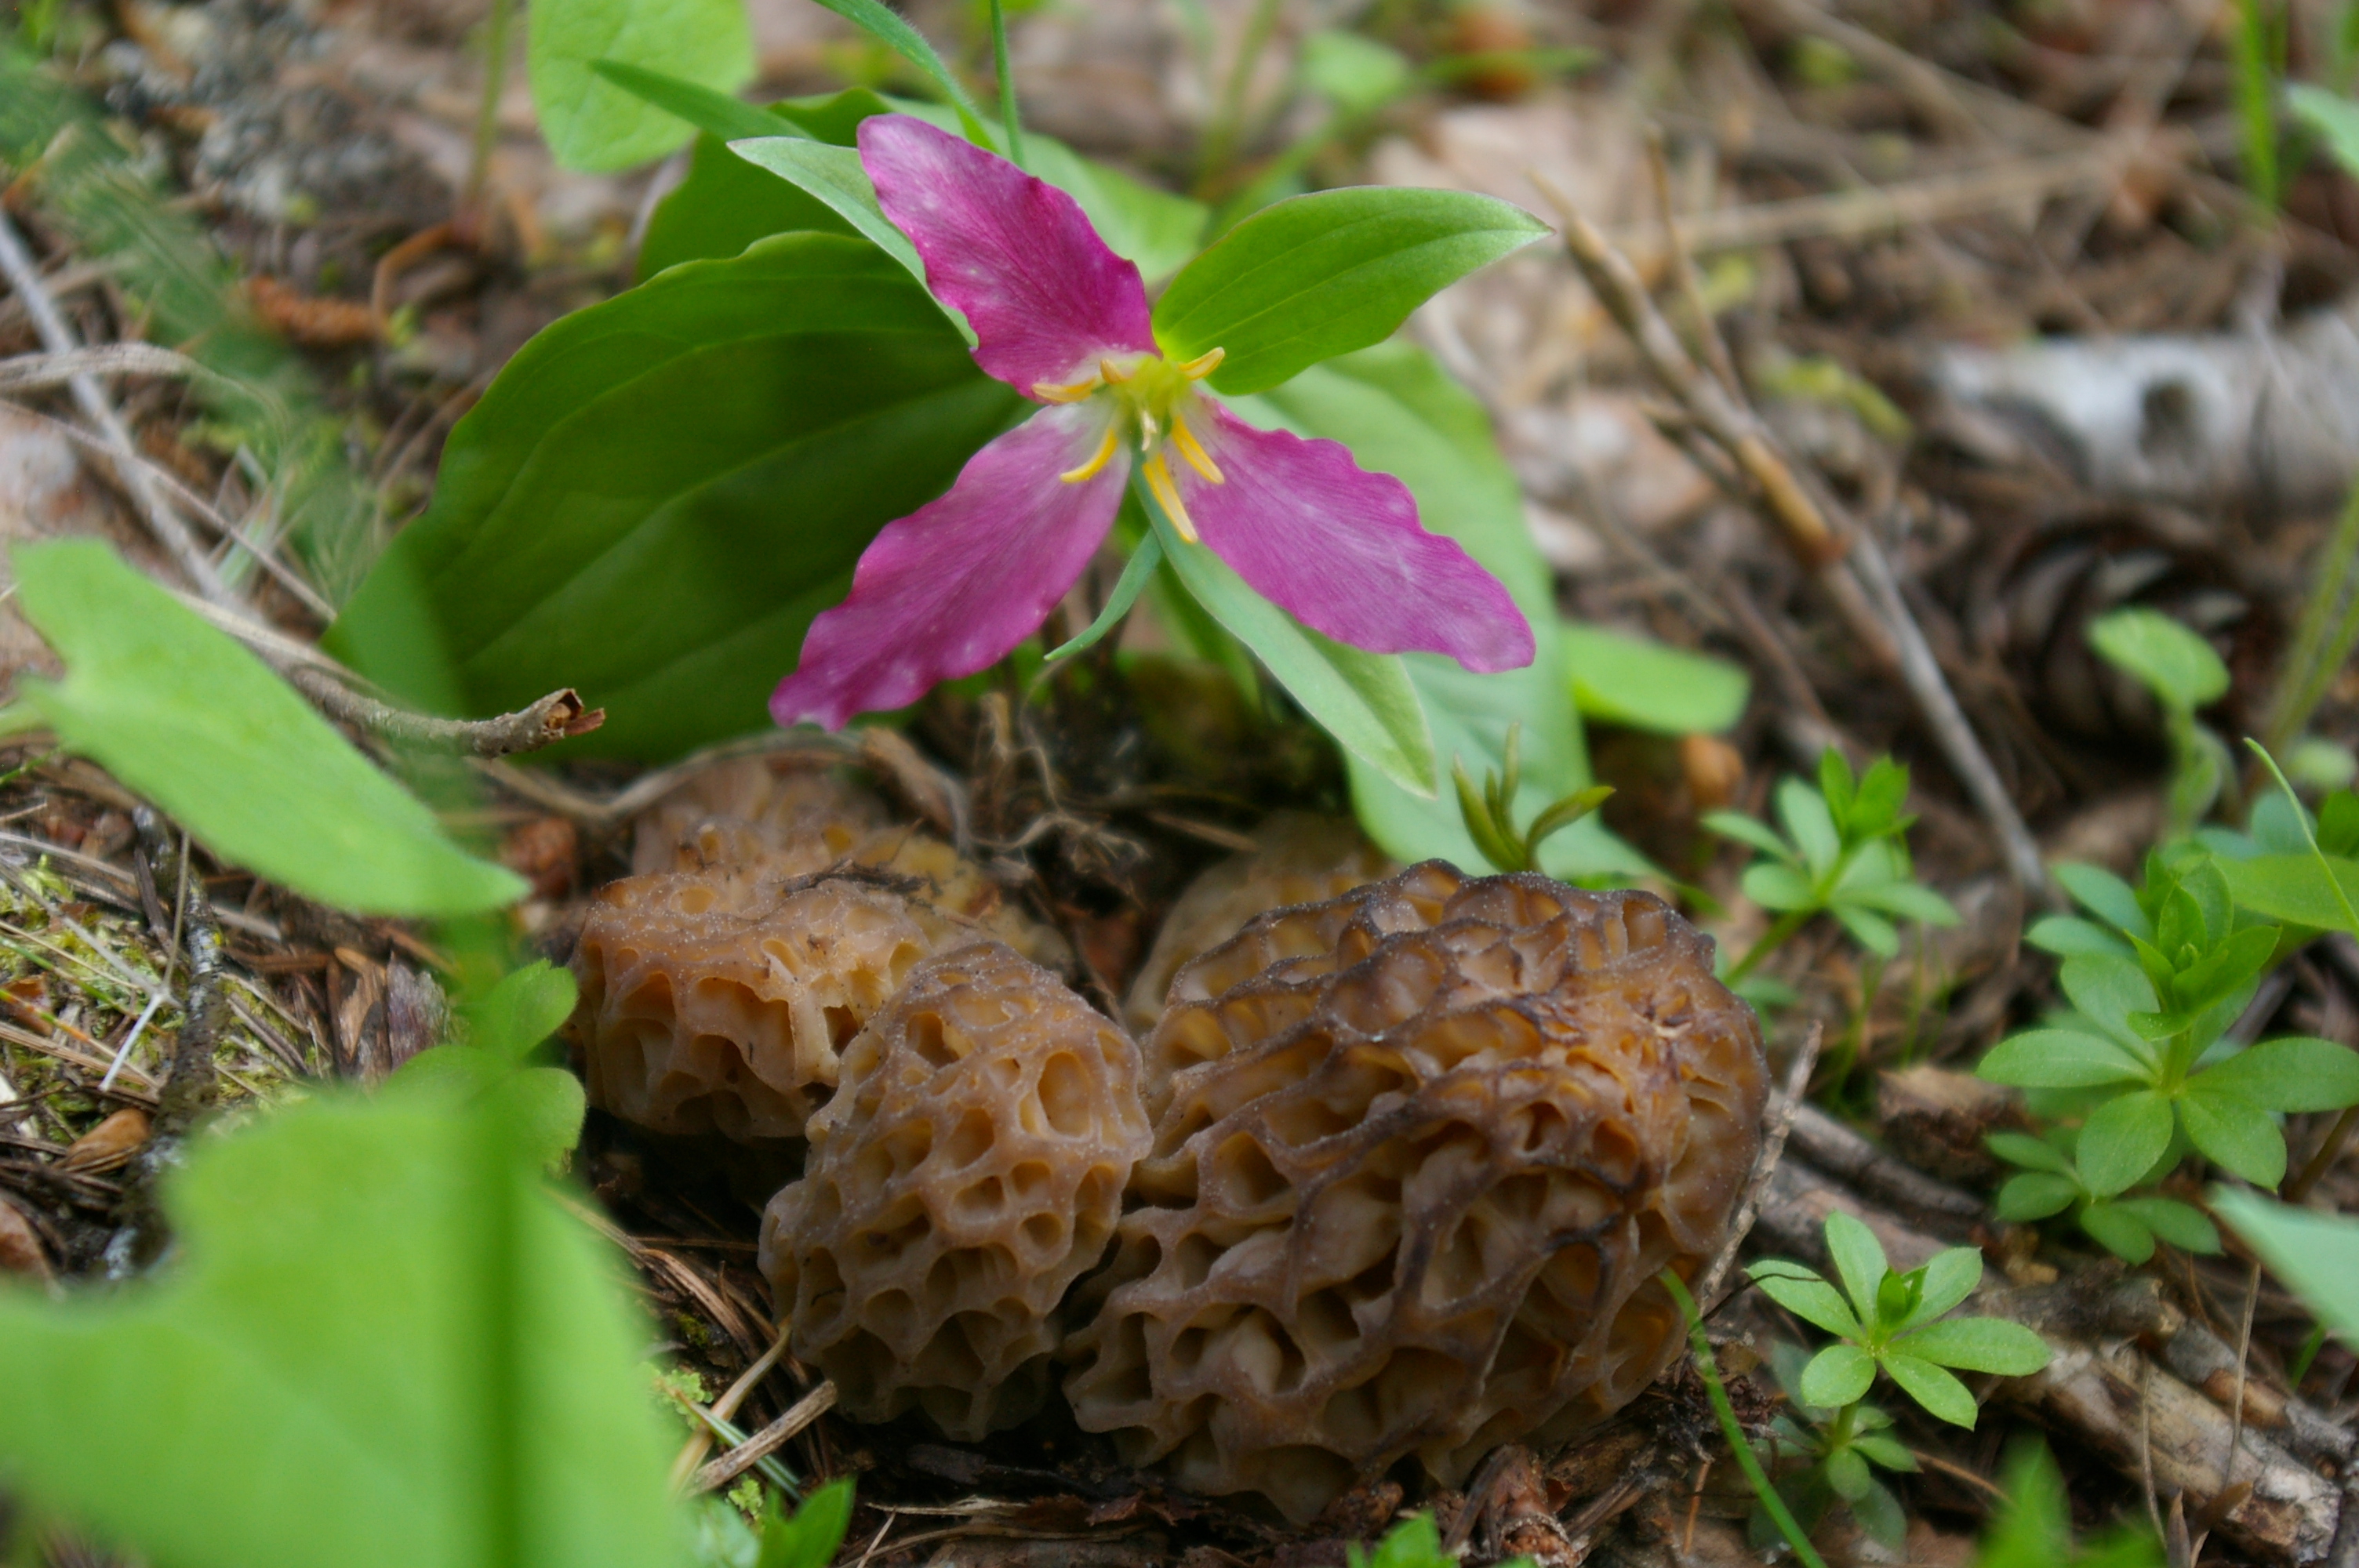
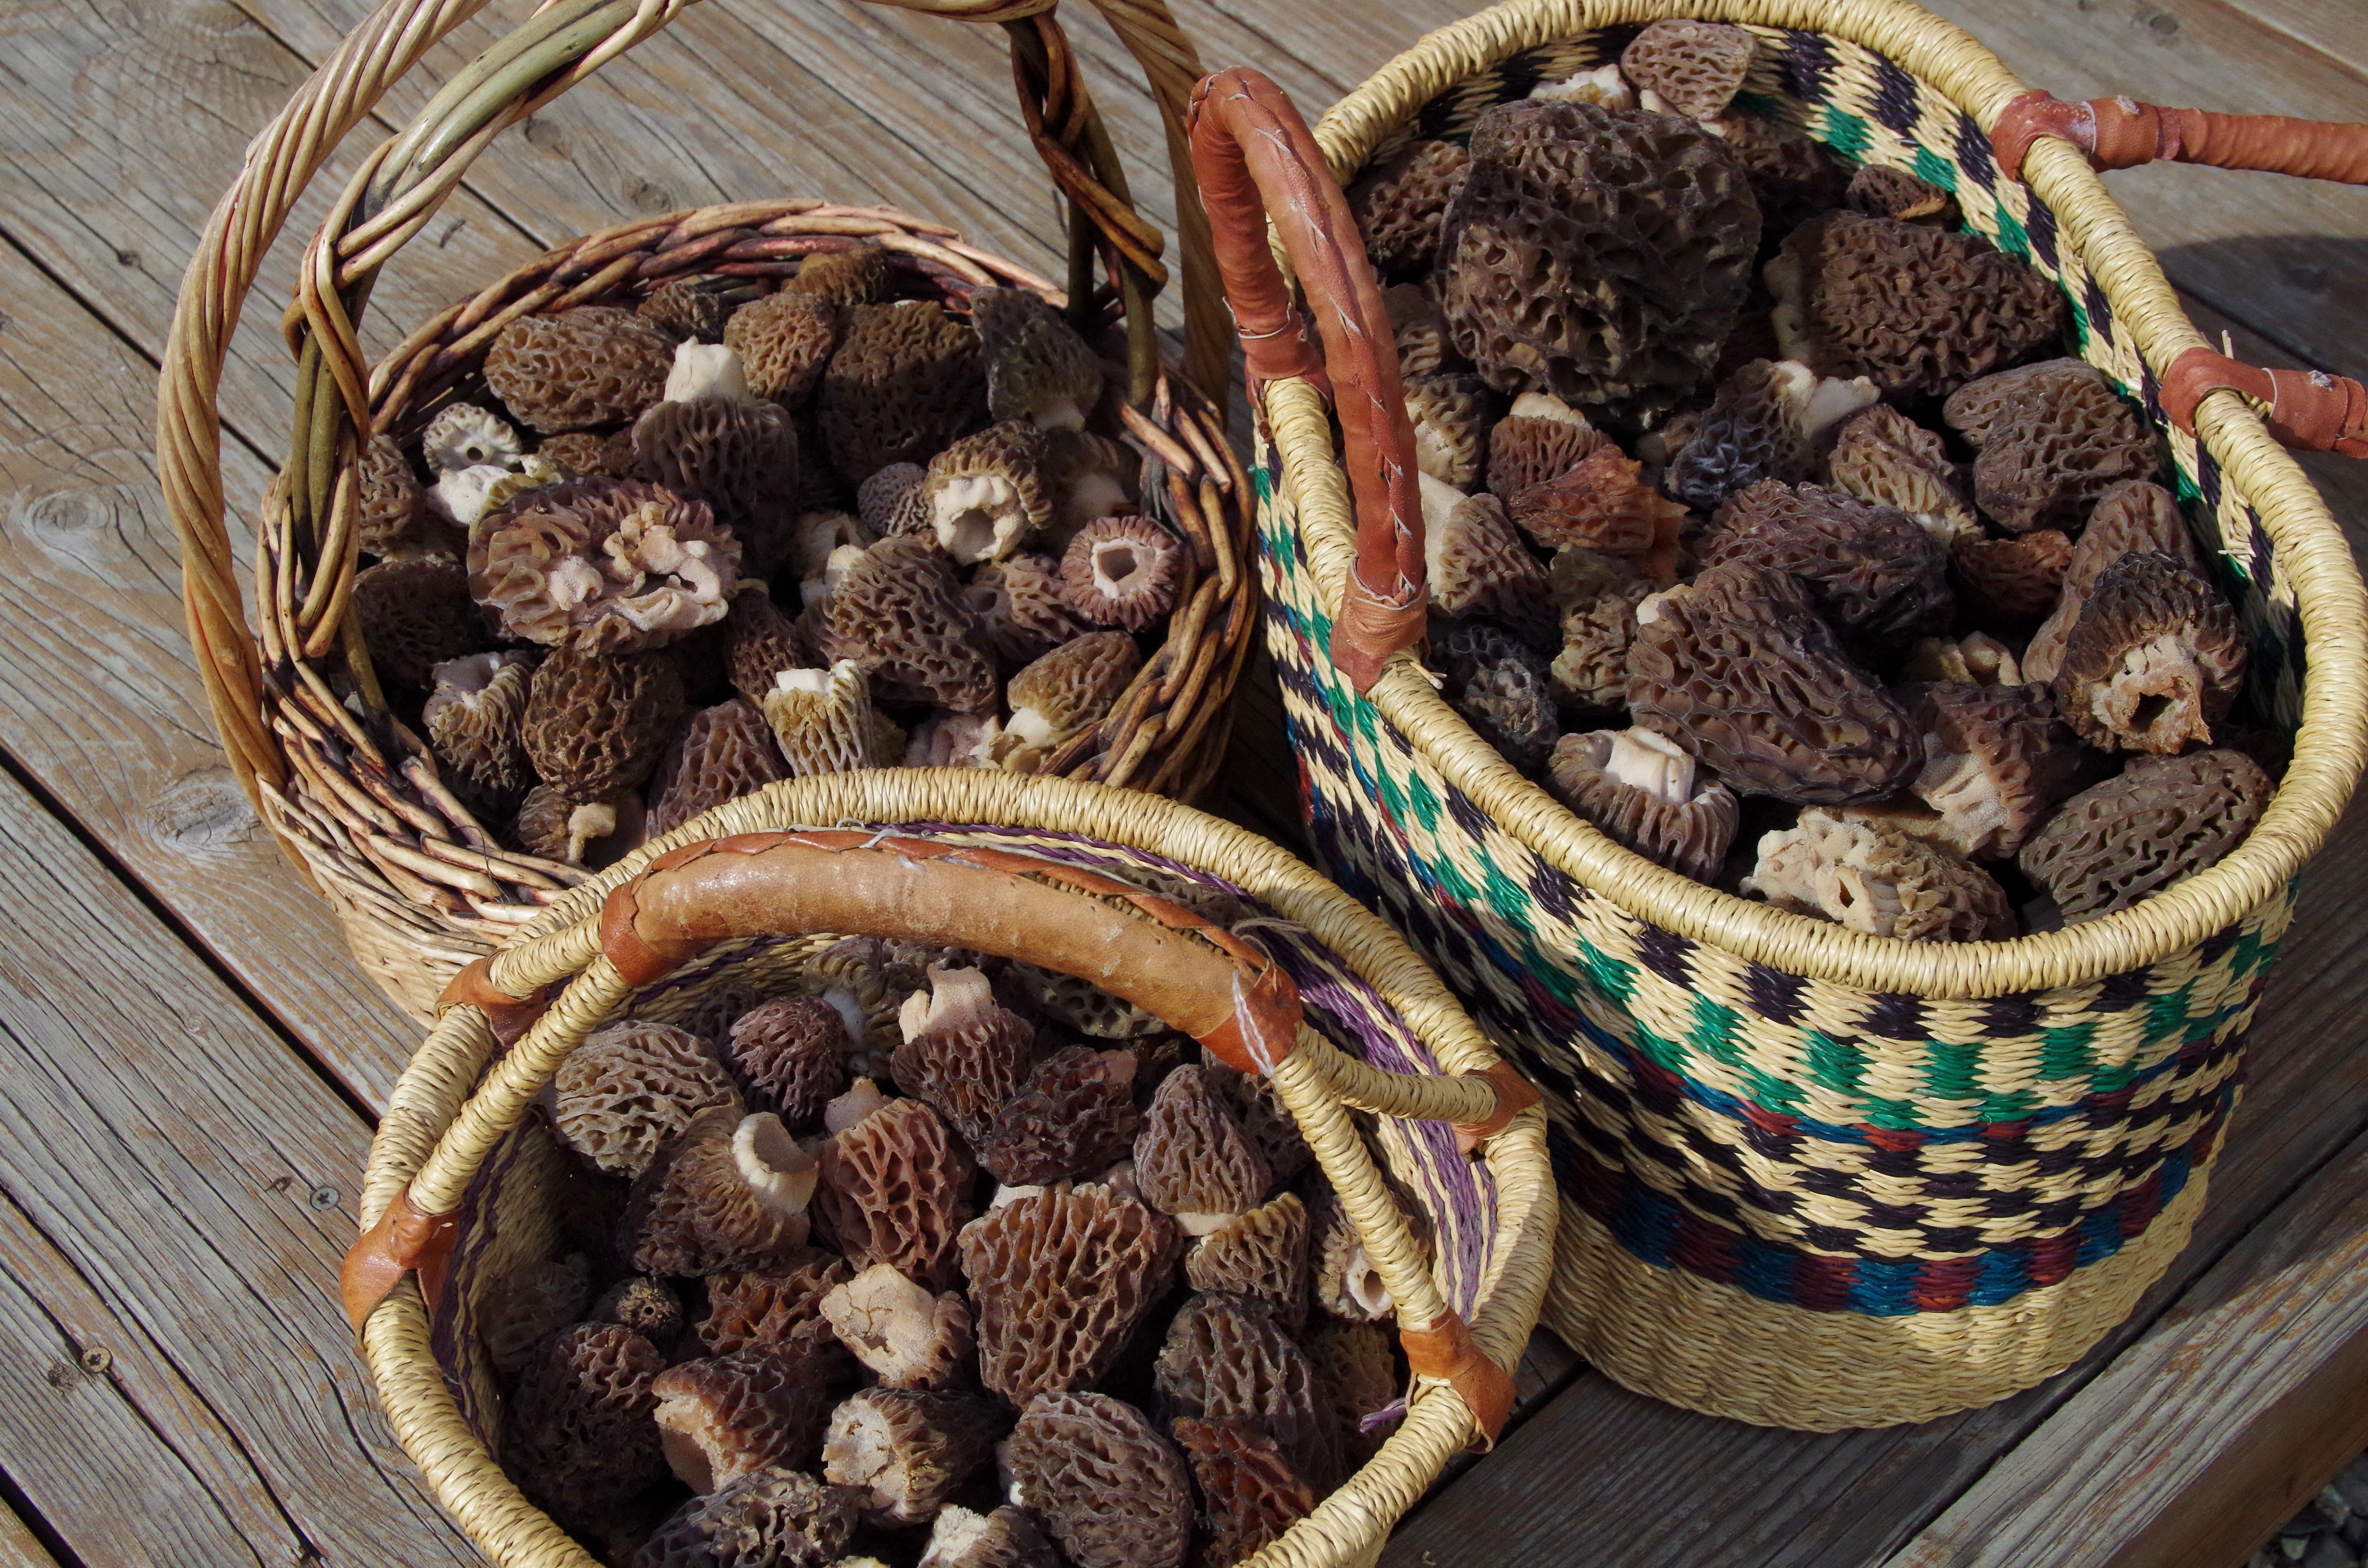
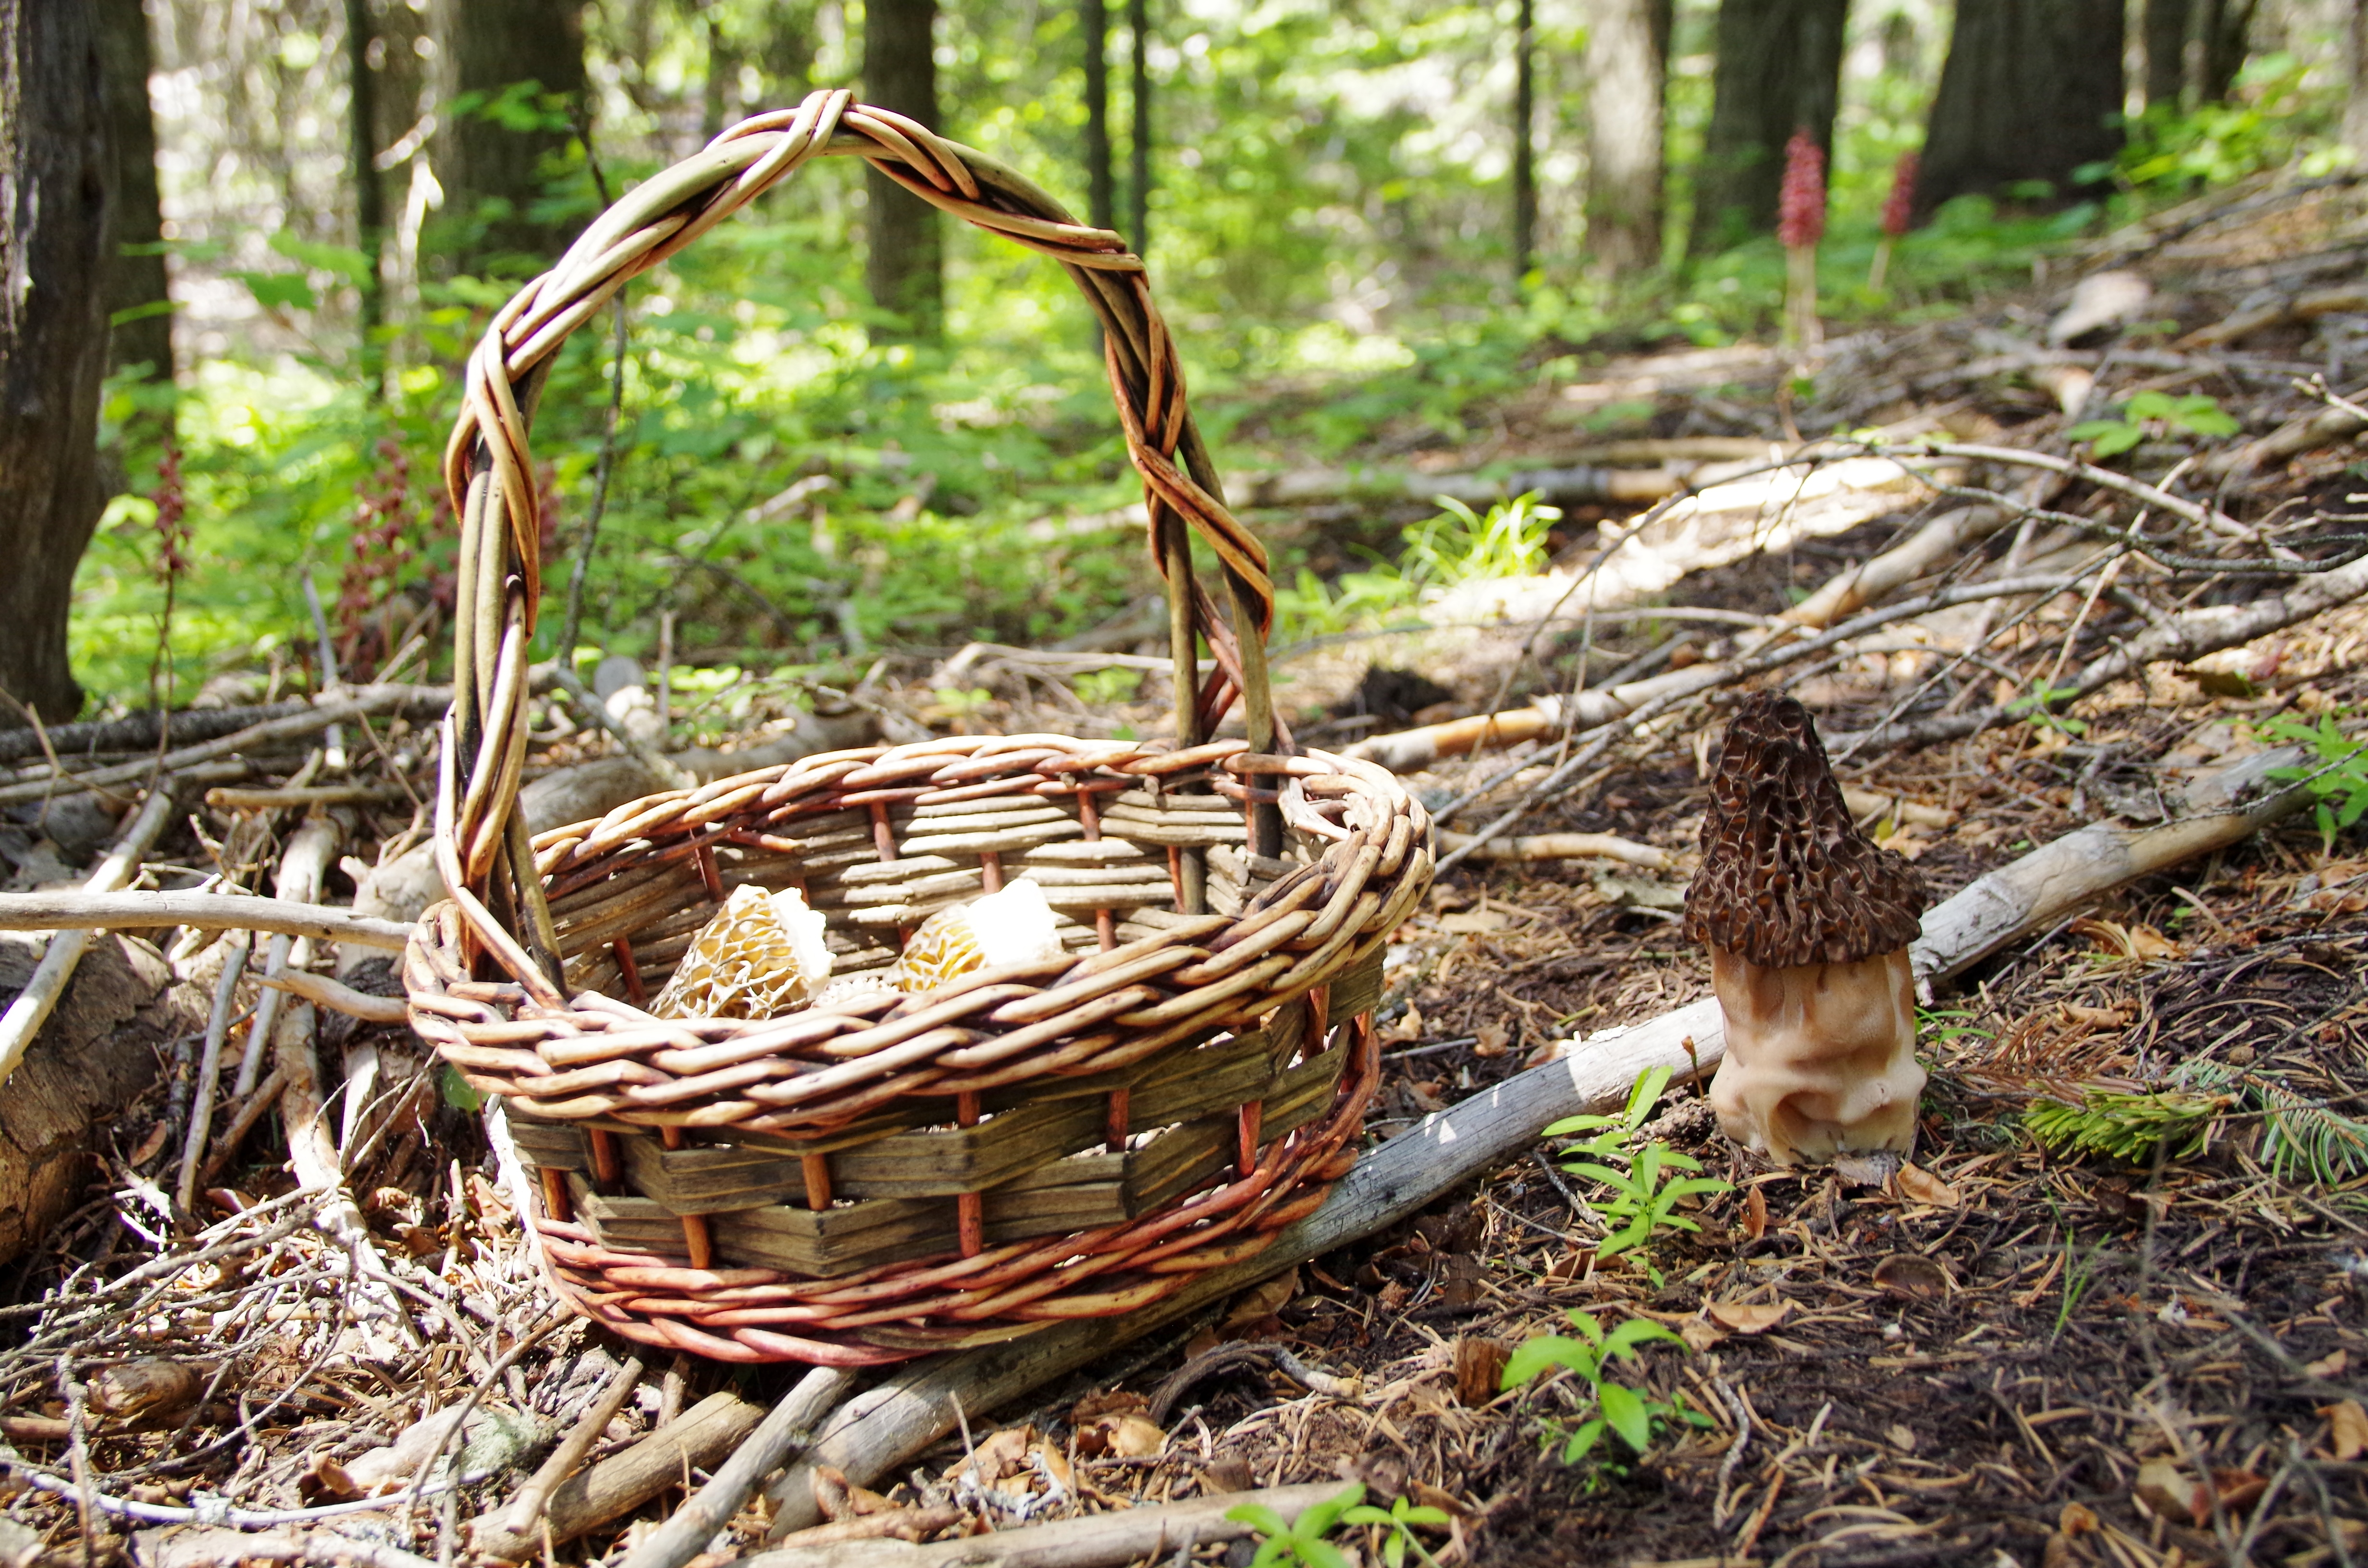
  • Elk & Morels- Red or cream sauce, Elk Italian sausage, morels, kale, ricotta cheese, mozzarella cheese

IMGP0122

Hay South Fork Ranch!

Every year in mid June I head into the South Fork Ranch to help put up the hay. It’s a working vacation and I love every moment of it!

IMGP1227 There are always amazing folks that come through the ranch over the couple of weeks I’m there.

IMGP1247 Everyone helps in their special way. Either bucking bales, driving tractor, cooking, or taking the kids to the beach. There’s a place for each and every person.

IMGP1314

There were several days this year where we had an all woman hay crew.

SFR Hay crew

It’s always fun to work with such strong, wonderful women!

SFR Hay crew 2

The little ones and the Nana’s even come out to help- bringing cookies, cold water & big smiles.

IMGP1316

Even Orange finds a special place to ride on the hay wagon.

IMGP1299

This year there was a good crop of hay. We put up a total of 3,200 bales!

IMGP1277

It’s amazing to be a part of the haying process. One day there is a field of tall grass, then a few days later, a sea of bales.

IMGP1270

We got lucky this year with only one rain storm. The rest of the days were hot & dry. Great weather for making hay!

IMGP1268

We pick up bales in the morning and stack them in the barn. Then in the afternoon I rake the hay that my uncle cut the day before, putting two rows together. Hayin' at the ranch

The hay gets raked one more time and then baled up.

IMGP1278

About the time haying is done, we’re all ready to head to orchard to pick cherries, or head to the beach and jump in the river.

IMGP1334

Then, just like that, the sprinkler pipes are all moved back onto the fields and it’s back to irrigating until the second cutting.

IMGP1348

Through all the hard work everyone is full of smiles, truly enjoying the time spent.

IMGP1311

This is one of the things to pass down to the generations- a real, working Idaho backcountry ranch that brings friends and family together to work hard and play hard.

IMGP1237

The generations come together here and people take the time to enjoy the present. This is as real as it gets.

IMGP1252

April and May- showers & flowers

The spring blooms are orchestrated in sequence, some enduring hard frosts, others blowing away with the wind. I love seeing everything bloom around our place and in the mountains.

IMGP1559

From the service berry & syringa, to all the different fruit trees, the violas, larkspur, crocus, camas root, and lilacs. The buttercups, balsam root, lupine, paintbrush, and shooting stars.

IMGP4588I love flowers. I love seeing them in the fields, the mountains, my garden, and in a vase on the table.

Mother's Day special bouquet

Mother’s Day special bouquet

Bring on the showers if it means more flowers. We had such a dry April and didn’t get rain until mid-May. The lawn was getting crispy and plants in the garden were wilting without regular hand-watering.

Spring storm on the horizon

Spring storm on the horizon

Finally, the rains came, and they’re still here. We are finally getting enough rain to green up the hillsides, freshen the flowers and bring that amazing smell of rain.  The last week has been the perfect blend of rain and sunshine.

Killgore's Orchard in White Bird

Killgore’s Orchard in White Bird

Enjoy the smell and view of flowers wherever you travel this spring and early summer. Take the time to stop and enjoy their beauty.

IMGP1556

Maybe pick a bouquet for your someone special.

IMGP7935

Riggins Rodeo & Morels!

The month of May starts out with the Riggins Rodeo, one of the first in the state. My family and friends have been camping at rodeo time for over 30 years. We all come out of winter hiding and gather for a few days of spring enjoyment. Riggins RodeoWe are now into the second generation, and this tradition is rich and vibrant with life. It’s the new generation that makes us realize that it’s important to take the time to enjoy the riches that life has to offer. The time away from work and time with family and friends; these are the good times to relish.

IMGP3878May is always so busy in the garden, yard & sun room, but it’s also the moth to make time to spend with family and friends before we all get swept away with summer. This is my favorite month to get out in the mountains for hiking and morel hunting.

IMGP0769We love to get out and wander around in the woods looking for morels. It’s like being a kid on a treasure hunt. When all the elements are just right, it’s as if you can hear the mushrooms popping out of the ground. This is one of those years.

IMGP4471The best part about morel hunting is the slow pace. Like most hunting adventures, if you’re going too fast, you’re probably missing out. Slow down and stop to smell the flowers.

IMGP4465

Coralroot Striped Orchid

Here are a few morel hunting tips:

  • Find the right location- partially north facing aspects with the right adjacent community- fir trees, heart leaf arnica, trillium, glacier lily, huckleberry bushes, calypso orchid (fairy slippers), striped coralroot orchid, etc…
IMGP0752

Clematis

  • Harvest responsibly- Never pick the whole mushroom, cut just below the cap & leave the base in the ground (I use my fingernail, some us a small knife). Tap the mushroom before picking & shake in your hand in an effort to release the spores & ensure future growth.

IMGP1836

  • Leave the old and the very young. Only pick mushrooms in their prime. Leave the older ones that are releasing their spores, buggy or starting to slime back into the soil. Let the little ones live on. It’s not necessary to harvest every mushroom in the forest, pick the best sensibly & let the rest go.

IMGP0765

  • Use a basket for your harvest. This allows the spores to drop through as you walk, gives the moist specimen plenty of air, and doesn’t crush them as you build up your basket full. Avoid bags if possible, especially plastic. Morels are delicate, handle with care.

IMGP4472

  • Morels like hidey-holes where they are protected- old stump holes, around fallen logs, at the drip line of firs, etc… Take that extra step and peer over the logs and into the depressions in the earth.

IMGP0746

  • Most of all, have fun finding your own special hunting grounds and take your special friends and family to enjoy. Keep your sacred hunting grounds to a select few, though. This is just how it is. Everyone should get out and discover their own special place and relish the feeling of self discovery & successful harvest. It takes time, but this feeling reaches deep into the heart & soul. It is worth it!
IMGP0772

From here the morels are separated for drying

  • We don’t wash our harvest unless absolutely necessary. There shouldn’t bee too many bugs if they are fresh & no dirt if the stems are cut properly. If there are any dirt or bugs, they will fall out when they dry. Set the mushrooms out to dry on trays- don’t let them touch & give them plenty of air flow. Any that are in need of quick drying, place them on a dehydrator and cut in half if necessary. You can place in a paper bag after dry and shake to remove any additional debris, if needed. Store only the most perfect morels together. Any others store separately.
IMGP0817

An all Idaho harvested meal- Elk burgers, morels & young onions.

The April Garden

Is it really May already? I’m already looking into June and it’s hard to believe that April was just here not long ago. When the early spring season starts to silently awaken the life in the mountains, the garden starts to come alive.

IMGP7764

Plants are bursting with new growth and blooms- The raspberries get their leaves in what seems like overnight, the strawberries are running everywhere, and bulbs flower with an array of colors.

Gram's spring bloom

This is the time of the year when the “to do” list is ever growing. Each time you cross one chore off the list, three more grow. April gardening is full of cleaning up and prepping spaces- hauling fertilizer, turning and tilling, mulching, thinning, and planting early seeds.

IMGP0180

The cold cops all go in the ground after their transition period to the outside world. This year I grew 5 different kinds of kale- Scarlet, Starbor, Nero di Toscana, Dwarf Blue, & Dwarf Siberian, 2 kinds of cauliflower- Amazing & Romanesco, and 5 varities of broccoli- Packman, Calabrese, gypsy, Atlantic, & Arcadia.

IMGP0187

Peas are always in early, along with the Swiss chard, beets, onions, escarole, lettuce, spinach, carrots, parsley root, and radishes. I love the snap peas, as well as oriental & snow peas, and pod peas. My favorite Swiss Chard variety is probably the bright lights, but I also grow individual varieties spanning the full color spectrum. This year I’m growing 7 varieties of beets, 11 types of carrots, 16 kinds of lettuce, 11 varieties of onions, 3 types of spinach, and 7 kinds of radishes.

Early seeds and plants just coming up

Early seeds and plants just coming up

The garlic is growing great. They look like strong and healthy stalks.

IMGP0192

The bed of leaves and pine needles keeps the weeds down, ads mulch, and insulates in the winter.

IMGP0208

The Swiss Chard is still growing strong from last year’s crop. The thick bed of leaves really keeps the root base alive  through the winter and they just flourish in the spring. I love having the chard, kale, collards, escarole, and radicchio greens to seek out for early spring meals.

IMGP0190

A goof friend of mine recently was telling me about her garden and all the wonderful greens, lettuce and onions she was picking and enjoying with her husband. With a big smile, she added, “Well, you know, things just grow good with all that love.”

Happy Gardening with Love!

Juni_flowers

Jaclyn’s Smoothie Recipe

Fresh and frozen fruit is such a big part of my everyday life. Especially in the winter and spring when I am really craving for the fruit to be back in season. I love to make smoothies and eat berries with breakfast, yogurt or dessert; which means I pick A LOT of berries and fruit when they are ripe for the picking.

A morning of picking at the local orchard

A morning of picking at the local orchard

I make smoothies almost every day with lots of berries and fruit, mixed with an assortment of yogurt, peanut butter, flax oil, hemp seeds, almond & coconut milk, etc… Use my recipe to as a guideline and  share a yummy and healthy part of my day.

The Smoothie making spread

The Smoothie making spread

I know a lot of people add greens, protein powders, etc…, but I don’t. I love my greens on their own, and eat enough greens and protein in my diet. But please feel free to be creative and add whatever you like to my recipe. That’s what it is for, a place to start and inspire!

Fruit, yogurt, peanut butter

Fruit, yogurt, peanut butter

Ingredients:

  • Cherries, frozen- 5-10 Bing Cherries, 10-15 sour/pie cherries & a handful of black cherries
  • Raspberries, frozen- one handful
  • Boysenberries, frozen- one handful
  • Blackberries, frozen- one handful
  • Peaches & Nectarines, frozen- one of each, medium size (more or less depending on size)
  • Bananas- one and a half
  • Oranges & Tangerines- one half an orange & juice from one to two tangerines
  • Grapefruit- one third
  • Peanut Butter- approx. 1/2 cup
  • Hemp seeds- approx. 1/8 cup
  • Flax Seed Oil- approx. 1/8 cup
  • Yogurt- approx. 1/4 cup of low fat & 1/4 cup whole milk yogurt
  • Milk or juice of choice- I typically use 1/3 unsweetened almond, 1/3 unsweetened coconut & 1/3 dark chocolate almond milk, plus a splash of grape juice

Put fruit in blender, starting with those at the top of the ingredient list (harder, frozen fruit first), pour liquids of choice over the ingredients. Blend until desired smoothness. It is best to use at least half frozen fruit to create the right consistency. Serve & enjoy!

Ready to blend

Ready to blend

Make enough for one meal to serve 2-3 people, or put a portion in a glass jar and refrigerate for the next day; which is great if you have a busy or travel day coming up. My husband also enjoys having a smoothie to-go in the morning, so I make enough for him to take to-go when it works with his schedule.

IMGP9687

I use a mix of fresh fruit and stock piled fruit in the freezer or store room; all harvested or purchased in season (with the exception of bananas; which I buy year round). Here are a few tips on how to stock up on the above ingredients, and a few possible, additional ingredients:

IMGP9689

  • Berries- pick in season, put on trays, freeze & store in bags for later use
  • Nectarines & Peaches- pick in season, remove stone, halve, put on trays, freeze, & store in bags for later use
  • Citrus- we get a lot of citrus in the winter from Nature’s Table (a local supplier that goes down to AZ orchards and picks) and I like to freeze the juice in ice cube trays for later use
  • Melon- cube up when in season, put on trays, freeze, & store in bags for later use
  • Plum & Pear- puree plums and pears when in season and freeze in ice cube trays for later use. Puree the skins and all. Then add how many cubes you want to the smoothie.
  • Apples- use fresh in season or store certain varieties your store room from fall to early summer
  • Mango, Pineapple & other tropical fruits- use fresh in season & freeze on trays when available
  • Carrots- I love to add carrot juice to the mix. It’s so sweet and refreshing. Maybe even a little ginger!

IMGP0149

Use what other fruits and vegetables you have and like in season, and put away for the off season. Mix it up throughout the year to keep it different. Variety is the spice of life!

*Use your citrus peels to wipe off your cutting board when the task is done; plus it refreshes your cutting surface. Be amazed at how sponge-like a grapefruit peel is!

Cooking and Eating with the seasons

In general, we cook and eat in harmony with the seasons, and with items we’ve put away in the pantry or freezer for the off-season. We don’t buy very many vegetables, fruit, meat, herbs, or spices from the grocery store, unless it’s something we are really craving, have run out of in the pantry or store room, can’t grow here, or need for a special purpose. We still strive to purchase these other items with a conscience; local, organic, in season, non GMO, etc… Of course, this isn’t always possible, but we do the best we can. It’s all about the love for food and what goes into our bodies to energize us.

IMGP3924

Ratatouille in the making

For the most part, the meals I cook are determined by what we have on hand. I have a hard time following many recipes because I change the ingredients or alter the recipe to what is available. This is where my creativity and pallet take over. Certain recipes do need to be followed for success (especially in baking), but I still may choose different types of flour, butter & oil, sweetener, nuts, seeds, etc.. Many of my recipes you will see posted have a variety of versions depending on what’s available, what I prefer, or who’s coming for dinner.

Loving the fresh fruit in season!

Loving the fresh fruit in season!

My family loves good food. We love all the aspects- growing the ingredients or seeking them out, fresh bursts of flavor, aged goodness, savory, sweet, bitter, the open door to anyone that comes  to visit or help, those who come to the table to eat or get sent leftovers, and above all, the love and time that goes into making and sharing it all. Without certain people in my life, and time spent creating in the kitchen, these recipes wouldn’t be here. Thank you Mom, Grandma Day, Grandma Truppi, Aunt Judy, my sisters & cousins, and the back county women who inspire me.

IMGP0928

Enjoy the creativity these recipes present and the basis they provide. Experiment, find what you like best and have fun. Happy Cooking!

Cookin' at the ranch - Copy

This winter we were busy in the store room and pantry

We finally ground all of our 2014 elk and deer meat and made it into burger and sausage. The end of February could be the longest we’ve ever waited to get this task done.

The pile of spices we use for the sausage.

The pile of spices we use for the sausage.

We had a total package weight of 214 pounds, originating from 150 lbs of elk & deer meat. We wound up with 82 lbs of burger, 82 lbs of Italian sausage, 28 lbs of bratwursts & 28 lbs of breakfast sausage.

Spices all ready to go into the Italian sausage.

Spices all ready to go into the Italian sausage.

This may seem like a ton of meat to some of you, but you must realize that we give a lot away. It is a labor of love.

Jeremy and Lou Ann getting ready to start in on the first phase of meat grinding.

Jeremy and Lou Ann getting ready to start in on the first phase of meat grinding.

We are very happy with the way everything turned out this year. It takes years to dial in sausage recipes, so we’re pretty excited to finally have the flavors we enjoy. At some point in the future I will post the recipes.

Elk and deer meat in two phases- ground & ready to be ground.

Elk and deer meat in two phases- ground & ready to be ground.

My husband, Jeremy, keeps amazing records. So I have him to thank for the consistent improvements. And we have our good friends to thank for helping with the process and always making it a party!

Jeremy and Jon mixing the Italian sausage. Brrrrr on the hands!

Jeremy and Jon mixing the Italian sausage. Brrrrr on the hands!

I still have a few things hanging on from last years garden. The long keeper tomatoes are still alive and some are holding exceptionally well. They don’t have the most incredible flavor, but they’re just fine for salads and sandwiches. The garlic is storing very well, almost no sprouting and I still have a half a shoe box full.

Heirloom garlic from the women of the Salmon River. Originally from Francis Zaunmiller Wisner.

Heirloom garlic from the women of the Salmon River. Originally from Francis Zaunmiller Wisner.

The peppers are all dried out and I’m using them almost daily in some meal (chopped fine or processed). The winter squash is holding up great. I still have a flat of small to medium sized assorted varieties. They all still taste wonderful.

Now that's a load of squash!

Now that’s a load of squash!

Last year was a bumper crop for apples. We store boxes of them in the store room and eat them all winter. Right now we still have boxes and boxes of apples and they are holding really well. They are good to eat fresh, baked and in smoothies. We also give our chickens a few apples every day; which they love.

SFR Apples

Our potatoes are also holding really well in the store room, just a few eyes sprouting. I have two varieties- a purple Peruvian type and a German gold type (from my good friends Heinz & Barbara). My neighbor, who was born and lived his entire 80+ years here on the Little Salmon River, always told me that Good Friday is the time to plant spuds in the garden here. I’ve got three rows planted out there and I was only a few days behind. He’d be proud!

Mounding spuds in 2014.

Mounding spuds in 2014.

IMGP4545

Little garden yogi


In the Sun Room

Here’s what’s been happening in the sun room lately.

I started the first few rounds of seed planting. The first round was the cold crops, which I started on February 29th- kale, cabbage, broccoli, cauliflower, Brussel sprouts, radicchio, and onions. I moved them outside around the end of March to get them hardy for transplanting into the ground; which should be around the first week of so of April.

Cold crops are growing good. Seeds for tomatoes, eggplant, peppers & tomatillos are in the soil.

Cold crops are growing good. Seeds for tomatoes, eggplant, peppers & tomatillos are in the soil.

Tomatoes, Peppers, eggplant & tomatillos were started from seed on March 15th, and they are all pretty much up and growing. The tomatoes and tomatillos always seem to grow fast compared to the peppers and eggplant. I ordered a few seeds late and started them on March 29th, so they’ll be a little behind. I’m sure they’ll catch up!

My sun room in the midst of planting seeds.

My sun room in the midst of planting seeds.

• The Ricotto Peru peppers are doing great in the sun room! They are two years old now. They have a few peppers that are almost ready to pick and tons of new flowers. I’m trying my hand (q-tip actually) at being the busy bee, so we’ll see how the pollinating goes!

Yeah for baths in the sun room!

Yeah for baths in the sun room!

The Garden in January, February & March

Here’s what’s been happening in the garden and yard in January, February & March:

  • I cleaned out all of last years garden debris and pulled any posts or trellises.
  • Raspberries & Boysenberries– I got them all weeded, transplanted canes back into the bed, secured the support posts & wires, fertilized, and mulched. Ready to go for the season!
The garden in March.

The garden in March.

  • I pruned the lilacs and a few syringa and service berry bushes. I put cut branches into a rooting solution & planted 85 starts up on the hillside as an experiment to see if they will root. I may have missed the window of dormancy with the early spring, but it’s worth a shot.
My garden helper.

My garden helper.

  • I raked out the back flower bed (which I call Grama’s garden because many of the bulbs came from my Grama Day’s garden) & took down the temporary chicken fencing. I put fencing up for several years to give the plants a better chance of becoming established. With chickens roaming around this can be a real challenge.
One of Grama Day's Peonies I transplanted & haven't seen bloom yet.

One of Grama Day’s Peonies I transplanted & haven’t seen bloom yet.

Here’s what we’ve been eating from the garden in January, February & March:

  • We’re actually still eating a lot of fresh veggies from the garden. I’m digging carrots & beets every few weeks and have a good supply of bunching onions, leeks, Swiss chard, kale, collards, cilantro, parsley & other herbs like sage, oregano, mint, and thyme. The chives are just starting to poke out of their winter blanket.
Carrot and beet harvest in January.

Carrot and beet harvest in January.